|
利用[混合选项]让字体的颜色变得丰富多彩起来。为了突出效果,偶使用了比较艳丽的颜色,大家可以根据自己的喜好改变一些设置,有问题请大家跟帖。 最终效果图如下: 
1、新建一个空白文件,输入“DRIVE ME CRAZY”,在[文字工具] 状态下打开 状态下打开
 [切换文字和段落调版]面板,字型:Berlin Sans FB,大小:72点,文字上下间距:72点,左右间距:100,粗体,显示效果为强,对齐方式居中。 [切换文字和段落调版]面板,字型:Berlin Sans FB,大小:72点,文字上下间距:72点,左右间距:100,粗体,显示效果为强,对齐方式居中。 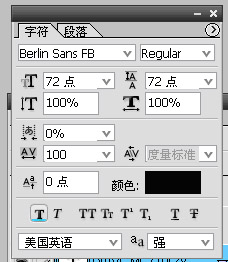
2、打开文字层的[混合选项],点击[斜面和浮雕]。在[结构]中,样式:内斜面,方法:平滑,深度:111%,方向:上,大小:4,软化:0。在[阴影]中,角度:125度,高度:10度,不要选取“使用全局光”,光泽等高线:选择半圆形并且勾选消除锯齿;高光模式以及暗调模式全为正常,不透明度100%,颜色为#180092和#FF0000。这一步是为字体加上两种颜色。 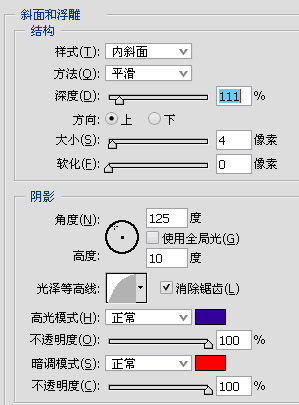
3、点击[等高线],等高线为线性,并且消除锯齿,范围100%。 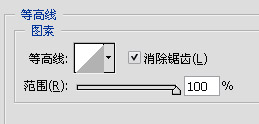
[page_break] 利用[混合选项]让字体的颜色变得丰富多彩起来。为了突出效果,偶使用了比较艳丽的颜色,大家可以根据自己的喜好改变一些设置,有问题请大家跟帖。 最终效果图如下:
1、新建一个空白文件,输入“DRIVE ME CRAZY”,在[文字工具]状态下打开
[切换文字和段落调版]面板,字型:Berlin Sans FB,大小:72点,文字上下间距:72点,左右间距:100,粗体,显示效果为强,对齐方式居中。
2、打开文字层的[混合选项],点击[斜面和浮雕]。在[结构]中,样式:内斜面,方法:平滑,深度:111%,方向:上,大小:4,软化:0。在[阴影]中,角度:125度,高度:10度,不要选取“使用全局光”,光泽等高线:选择半圆形并且勾选消除锯齿;高光模式以及暗调模式全为正常,不透明度100%,颜色为#180092和#FF0000。这一步是为字体加上两种颜色。
3、点击[等高线],等高线为线性,并且消除锯齿,范围100%。
4、点击[纹理],导入“岩石图案”纹理,选择“浅色大理石”,下图中第二行第一个。注意,图案相对平滑一些的纹理就可以了。 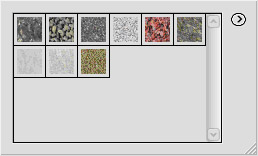
缩放101%,深度196%,并勾选“与图层链接” 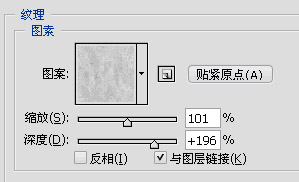
5、这一步我们为字体加上第三种颜色。点击[光泽],混合模式为正常,颜色白色,不透明度100%,角度为0,距离24像素,大小为0,等高线取线性,并消除锯齿。 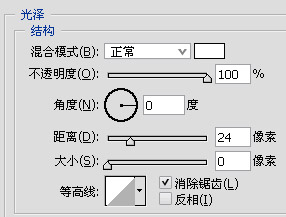
6、为字体加上第四种颜色,点击[颜色叠加],取色#24FF00,混合模式为正常,不透明度100%。 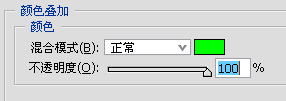
7、最后,为加强字体的感觉,描黑边4像素。 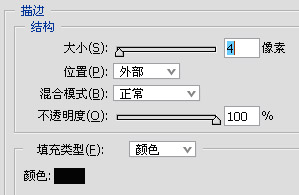
ps:有关原教程图的签名,如下图 
| 